List-Record count
Description
Inserts a static text control that shows the number of records in a List control.

The HTML for the List-Record count control looks like this:
Records: <span id="{dialog.componentname}.list1.RECORDCOUNT"></span>The example below shows how to implement this comtrol using a simple list derived from a static data source. In order to make this feature useful, however, it really requires a list in which rows of data can be easily added or deleted. To add these features see the 'List-Detail View-Buttons' control in the 'Defined Controls' menu.
Using List-Record Count with a List Based on a Custom Data Source
If the List Control is based on a custom data source, you Xbasic function that returns the data for the List must set the e.recordsInQuery property in order to use the List-Record count control with your List.
See Setting the Record Count for more information.
Add a List-Record Count to a List
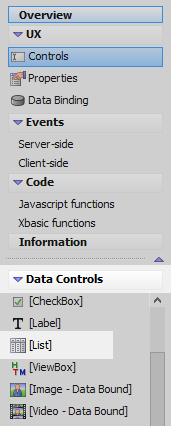
In the UX Builder on the UX Controls page open the 'Data Controls' menu. Click on the [List] option to add a list control to the component.
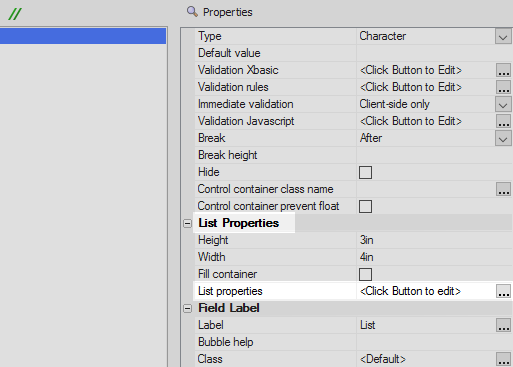
Highlight the list control. In the properties list on the right click on the
 button next to the
'List properties' property in the List Properties section. The List Builder will open.
button next to the
'List properties' property in the List Properties section. The List Builder will open.
On the List Builder's Data Source pane set the 'Data Source Type' to 'Static'.
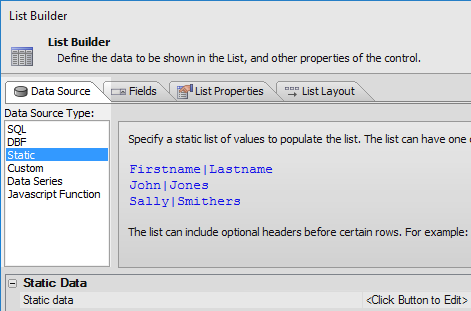
Click on the
button next to the 'Static text' property.
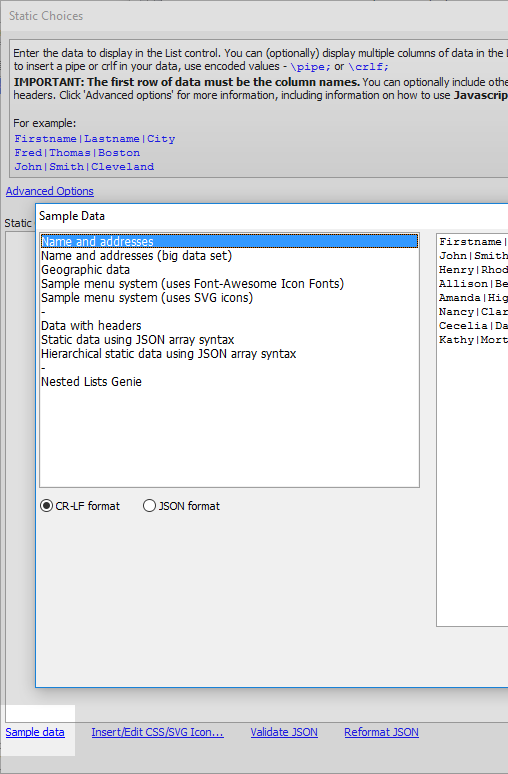
In the 'Static Choices' dialog click the 'Sample data' button. From the 'Sample Data' options highlight the 'Name and addresses' option. Click OK to add the data set to the Static Choices dialog and OK again to get back to the List Builder.
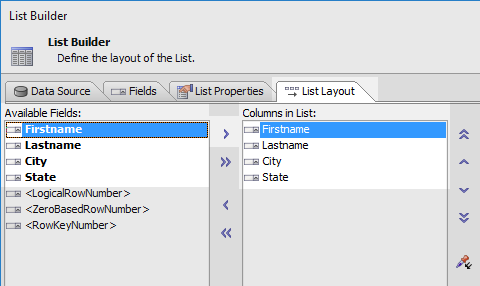
Open the 'List Layout' pane. Use the blue > arrow to move the four static data fields from the 'Available Fields' list to the 'Columns in List' section. Click OK to close the List Builder.
Open the 'Defined Controls' dialog and click on the 'List-Record count' option.
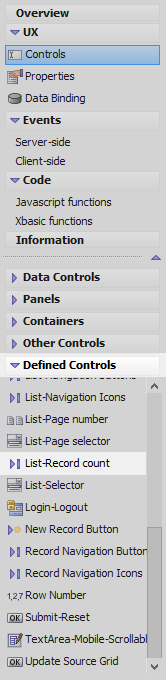
In the pop-up box that appears select the list you just defined, list1 in this case, and click OK.

Run the component in Live Preview. You should see the control displaying the number of records in the list.
